Nirmata requires read-only access to EC2 service if using ASGs or Spot Fleet Requests and full access to EC2 service if using Launch Configuration to provision your VMs. The secure way to provide access is by configuring an IAM role for Nirmata in your AWS account. To configure a role, you will need the Nirmata AWS account ID and an unique external ID. When the role is configured, you provide Nirmata the role ARN (Amazon Resource Name).
For the Nirmata Cloud Edition, there are two ways to provide secure access - using AWS IAM Role or using User with right policies and permissions. You can configure either option in your cloud credentials configuration. Nirmata Private Edition will need User configuration unless deployed in AWS cloud.
AWS IAM Role
To configure an IAM role in AWS:
- Go to Cloud Credentials and click +Add Cloud Credentials. The Add Cloud Credentials screen appears.
- Enter a name for your cloud credential and select Amazon Web Services from type dropdown.
- (Optional) Enter description for this cloud credential.
- Click Next.
- Under Settings tab, select a default region from Default Region dropdown. The Settings tab displays the Nirmata Account ID and External ID.
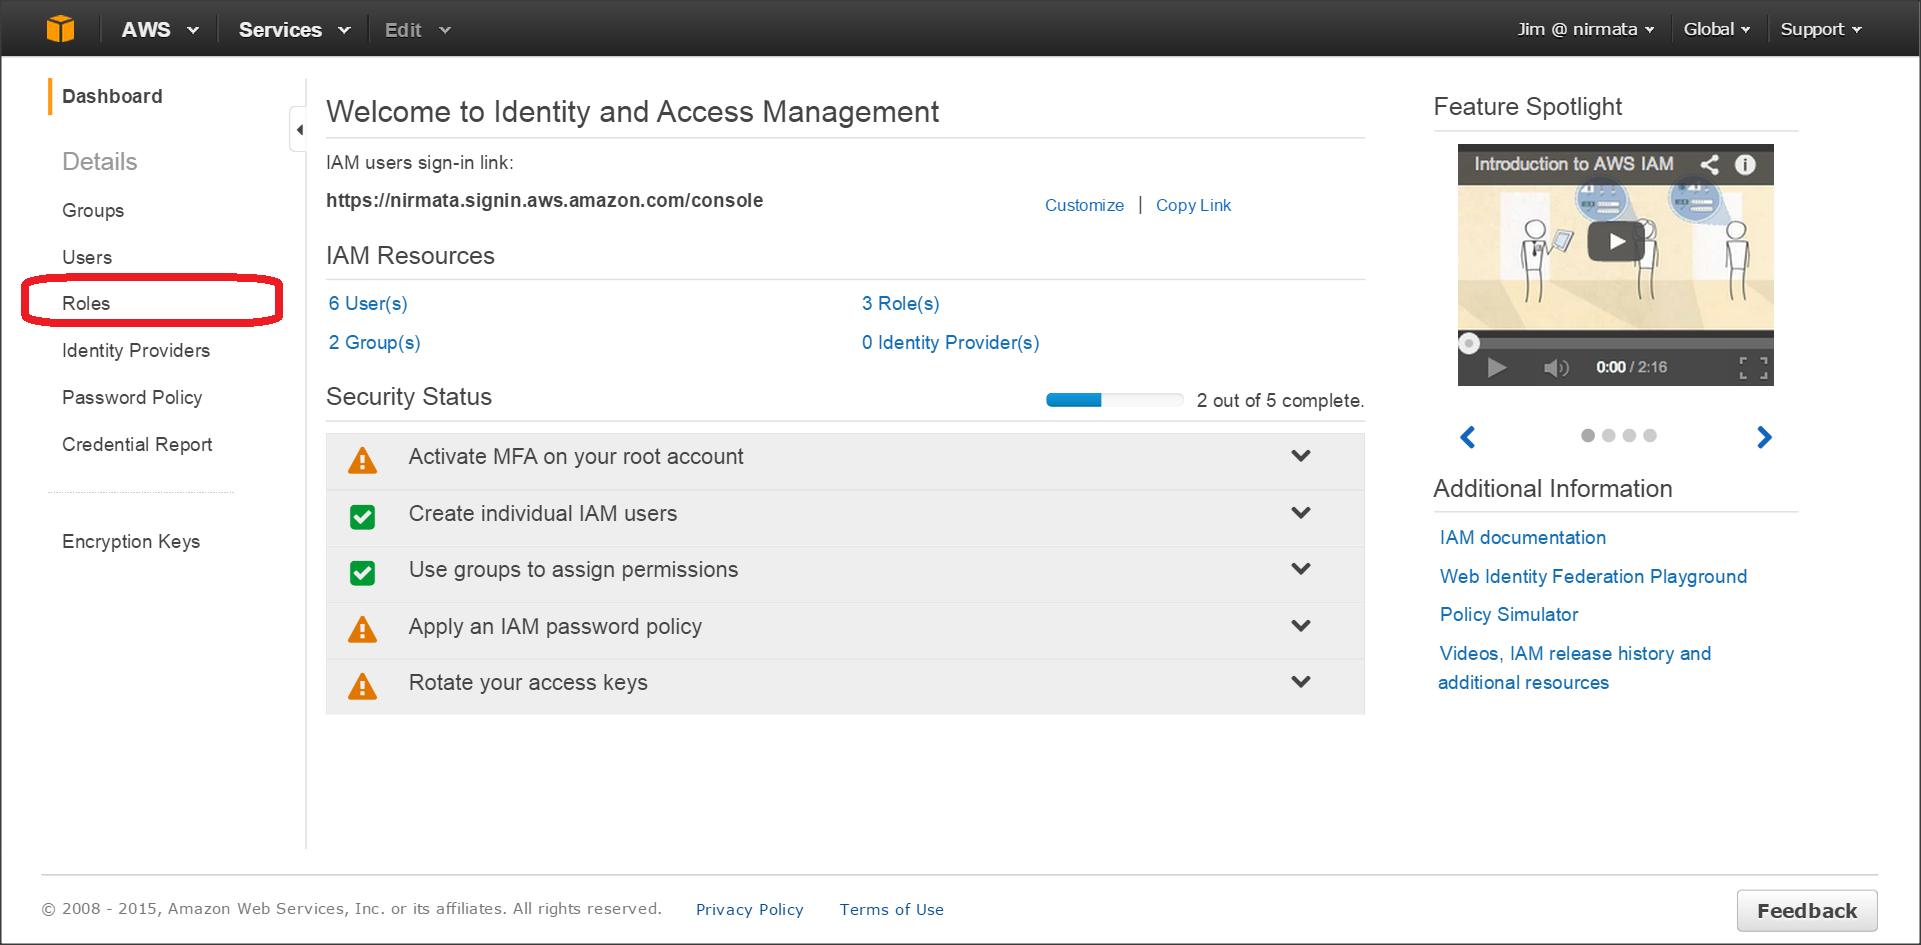
- Login to your AWS account and navigate to Identity & Access Management.
- From left side bar, click Roles.
- Click Create New Roles.
- Click Another AWS account and enter the Nirmata Account ID.
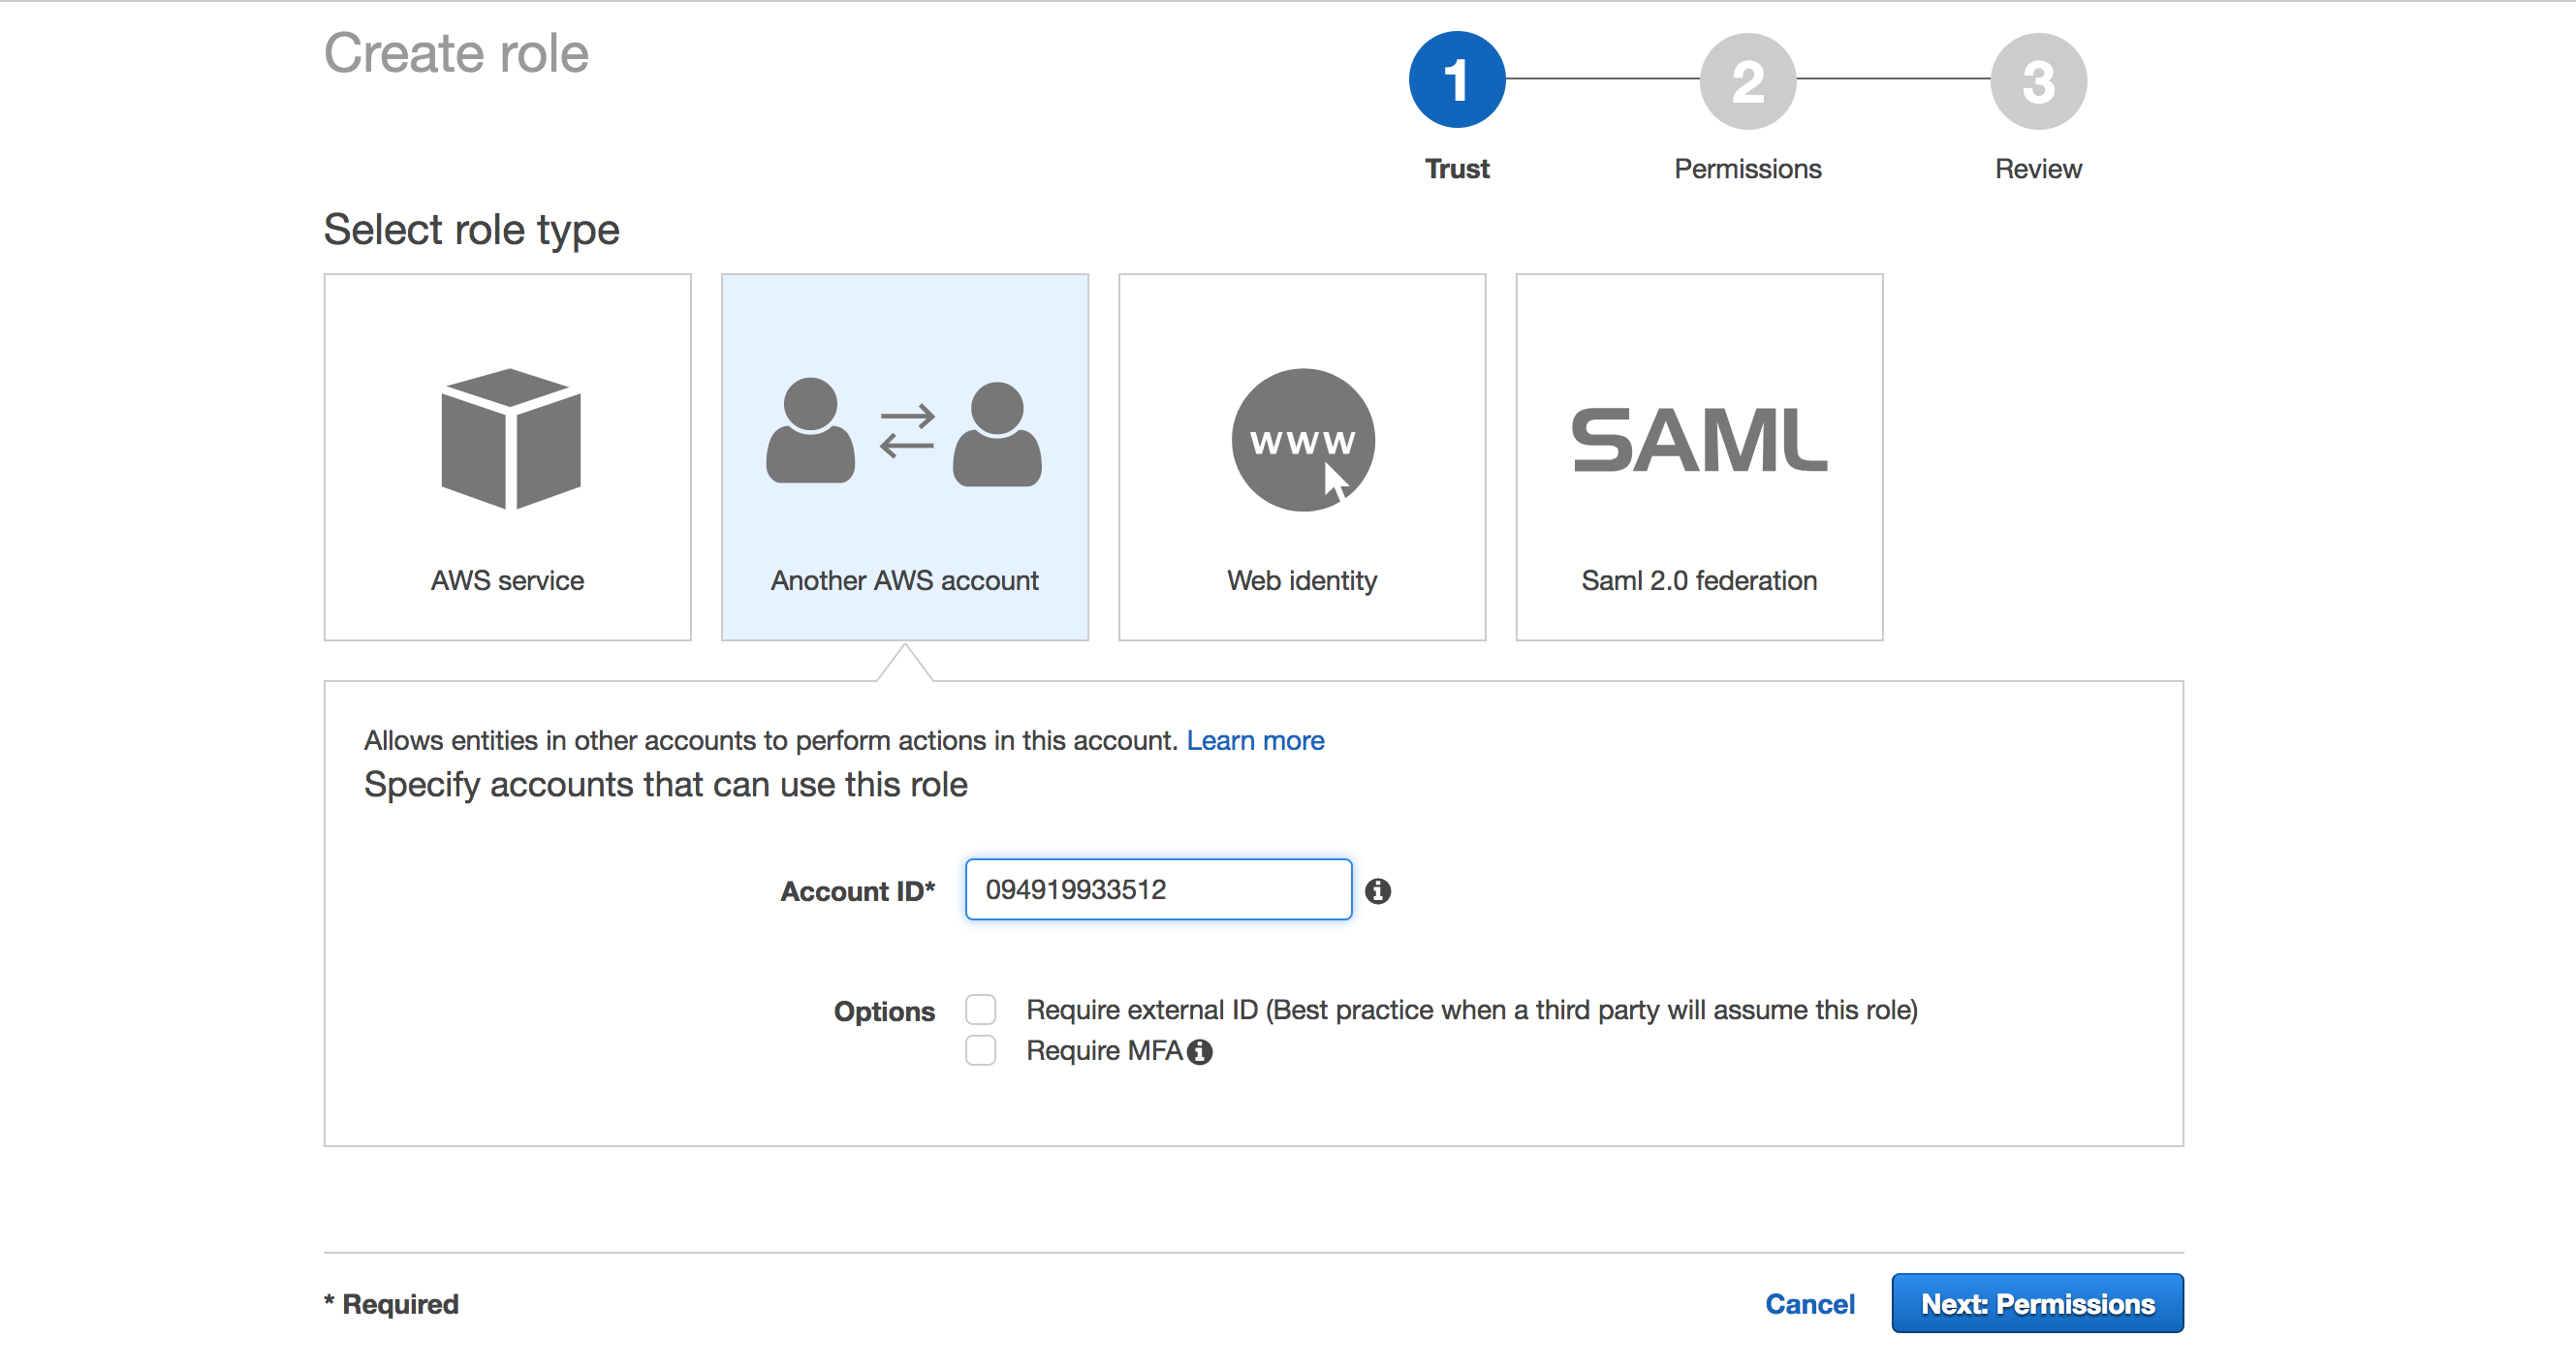 10. Click Next:Permissions. The Attach permission policy screen displays.
11. Select AmazonEC2ReadOnlyAccess checkbox and click Next:Review.
12. Enter a role name and role description for the current role.
13. Click Create role to create a AWS IAM role.
10. Click Next:Permissions. The Attach permission policy screen displays.
11. Select AmazonEC2ReadOnlyAccess checkbox and click Next:Review.
12. Enter a role name and role description for the current role.
13. Click Create role to create a AWS IAM role.
To view the Role ARN, go to the Roles page and select the required role.
You can also create a new custom policy such as NirmataAutomationPolicy for more granular access control.
Refer the following policy document to create a custom policy. This policy limits Start/Stop/Terminate Instance to the instances created by Nirmata with appropriate tag.
    {
        "Version": "2012-10-17",
        "Statement": [
            {
                "Effect": "Allow",
                "Action": [
                    "ec2:RunInstances",
                    "ec2:CreateTags",
                    "ec2:Describe*"
                ],
                "Resource": [
                    "*"
                ]
            },
            {
                "Effect": "Allow",
                "Action": [
                    "ec2:StartInstances",
                    "ec2:StopInstances",
                    "ec2:TerminateInstances"
                ],
                "Resource": "arn:aws:ec2:<region>:<account>:instance/*",
                "Condition": {
                    "StringEquals": {
                        "ec2:ResourceTag/com.nirmata.createdBy": "nirmata"
                    }
                }
            },
            {
                "Effect": "Allow",
                "Action": "autoscaling:Describe*",
                "Resource": "*"
            },
            {
                "Effect": "Allow",
                "Action": [
                    "iam:GetRole",
                    "iam:ListAttachedRolePolicies",
                    "iam:ListPolicyVersions",
                    "iam:ListInstanceProfiles",
                    "iam:GetPolicyVersion",
                    "iam:SimulateCustomPolicy",
                    "iam:PassRole"
                ],
                "Resource": "*"
            }
        ]
    }
NOTE:
Ensure to replace the
<region>and<account>placeholders for specific region or add a*to allow all regions in your AWS account ID.When deploying a Kubernetes cluster on AWS Host Groups, an IAM policy for the hosts in the cluster must be created. This IAM policy allows the AWS cloud controller to access AWS resources.
Refer to the link below for samples on IAM policies.
Master Nodes: https://github.com/kubernetes/kops/blob/master/pkg/model/iam/tests/iam_builder_master_strict.json
Compute Nodes: https://github.com/kubernetes/kops/blob/master/pkg/model/iam/tests/iam_builder_node_strict.json
For networking, Nirmata uses Amazon VPC CNI plugin (https://github.com/aws/amazon-vpc-cni-k8s). This plugin requires the following IAM policy:
    {
        "Effect": "Allow",
        "Action": [
            "ec2:CreateNetworkInterface",
            "ec2:AttachNetworkInterface",
            "ec2:DeleteNetworkInterface",
            "ec2:DetachNetworkInterface",
            "ec2:DescribeNetworkInterfaces",
            "ec2:DescribeInstances",
            "ec2:ModifyNetworkInterfaceAttribute",
            "ec2:AssignPrivateIpAddresses"
        ],
        "Resource": [
            "*"
        ]
    },
    {
        "Effect": "Allow",
        "Action": "tag:TagResources",
        "Resource": "*"
    }
Creating AWS Cloud Provider Video
Next Step: Setup an AWS Host Group.
AWS IAM Role for EKS
For EKS cluster management, Nirmata requires slightly different configuration as decribed below. In AWS console, navigate to new role creation as described in the previous section.
For the role, please add the following policy permissions -
- Add IAMReadOnlyAccess, and AmazonEC2FullAccess policies.
- Add the following policies using json input tab -
{
    "Version": "2012-10-17",
    "Statement": [
        {
            "Sid": "VisualEditor0",
            "Effect": "Allow",
            "Action": [
                "iam:GetRole",
                "iam:GetPolicyVersion",
                "iam:PassRole",
                "iam:SimulateCustomPolicy",
                "iam:ListPolicyVersions",
                "iam:ListAttachedRolePolicies",
                "iam:CreateServiceLinkedRole",
                "iam:ListInstanceProfiles"
                "eks",
            ],
            "Resource": "*"
        }
    ]
}